


diagonal tutorialzoom zoom zoomHeh, because it's such a repetative trait throughout my graphics, I thought I might show you how it's done. First open a new canvas, make sure it is set to TRANSPARENT and make the size nine by nine pixels. Be sure your foreground colour is the same as the colour you want your lines to be and make a diagonal line on the canvas, doesn't matter which direction it's going in. [you might want to zoom in.] Here are the two ways in which you could make your line: 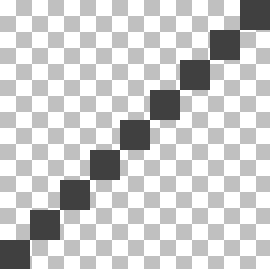 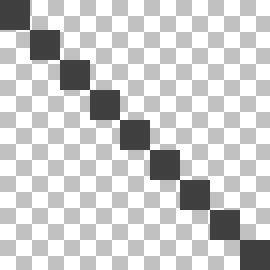 Now, keep them up, because you'll need them up for this next step. For this step, you need to make sure the window called, "Materials," is present on your screen. [if it isn't, just press the F6 key on your keyboard.] Now, there's a little circle guy under your foreground colour preview guy. If you hover over the circle guy, it'll say, "colour." So, you need to click that and hover down to the very last thing, that's the pattern guy. After you've done that, you click on the picture of the current pattern and a box should pop up. On that box, it says somewhere in there, "Current Pattern," and under it is an image of the current pattern. [so unpredicatable.] Well, anyway, it gives you a few preset patterns and then, it seems to have made patterns out of the images you currently have open on the program. Click your diagonal line one. Now, get the paint bucket tool and click inside your image; wa-lah[how is that spelled?], you have diagonal lines! If there was anything that you had a question or concern with in this tutorial, feel free to email me about it. [moonflamedesigns@gmail.com] Thanks for reading! |